Posts mit dem Label Hair werden angezeigt. Alle Posts anzeigen

20. März 2015

How to style a wavy bob

I was flipping through a fashion magazine the other day, while waiting in line at the supermarket. Apparently the wavy bob is the hottest hairstyle of the season. They're calling it the wob (Seriously? The wob!?). Of course, childish person that I am, I had to show the article to the boyfriend and do a little happy dance because I was wearing the wavy bob that day, too. Like it was a big deal and all.
But that little moment there in the supermarket inspired me to share how I do my wavy hair (almost) every day in a matter of minutes, so we can all wear the wob together and be all trendy and stuff, yay!
I'm not using any professional products and my curling iron is too thin for this kind of waves, but that's really not the point of this tutorial and also I'm no hair expert. I'll just go on and show you how I style my wavy bob in a quick and easy way, and maybe it inspires you to try a new hairstyle this spring.
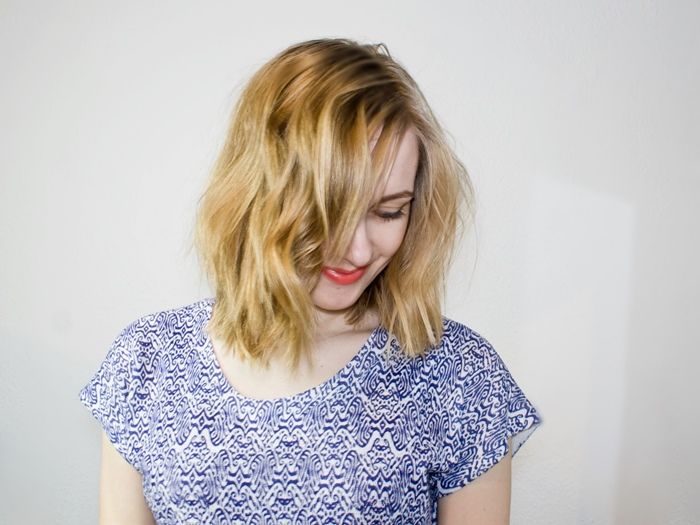
 photo IMG_06221_zpseqku5blk.jpg
 photo 2_zpsxofh2nld.jpg
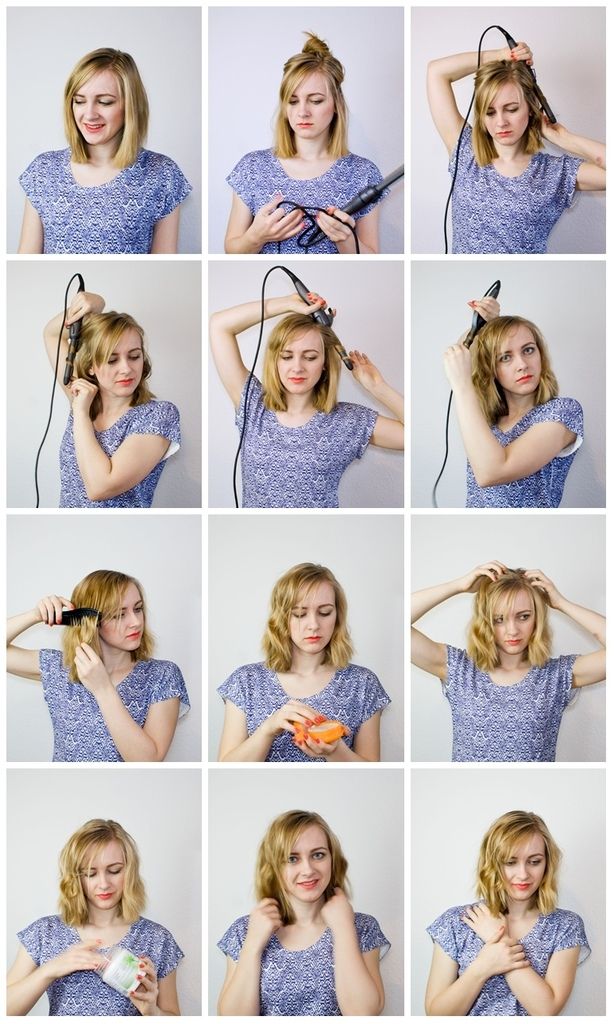
1. Sooo, that's how my hair looks like when I got out of bed. My hair is so slippery, there's no such thing as a bed head. Then I start by pinning the upper layers of my hair out of the way.
2. Then I use my too thin curling iron to curl the bottom layers. I do this strange thing where I hold the curling iron upside-down and I always hold it for four to six seconds for every strand of hair.
3. I remove the pins holding the upper layers up and curl those, too.
4. Now I comb it very gently to smooth out the curls a bit and work a small amount of pomade (which is actually my boyfriends) into my roots after that. I find it gives my hair a nice lift there.
5. Finally I work the tiniest amount of coconut oil into the ends for extra shine and voilà! Wob. Had to say that ridiculous word one more time.

 photo IMG_06111_zpsuqbwlkiq.jpg

28. Februar 2015

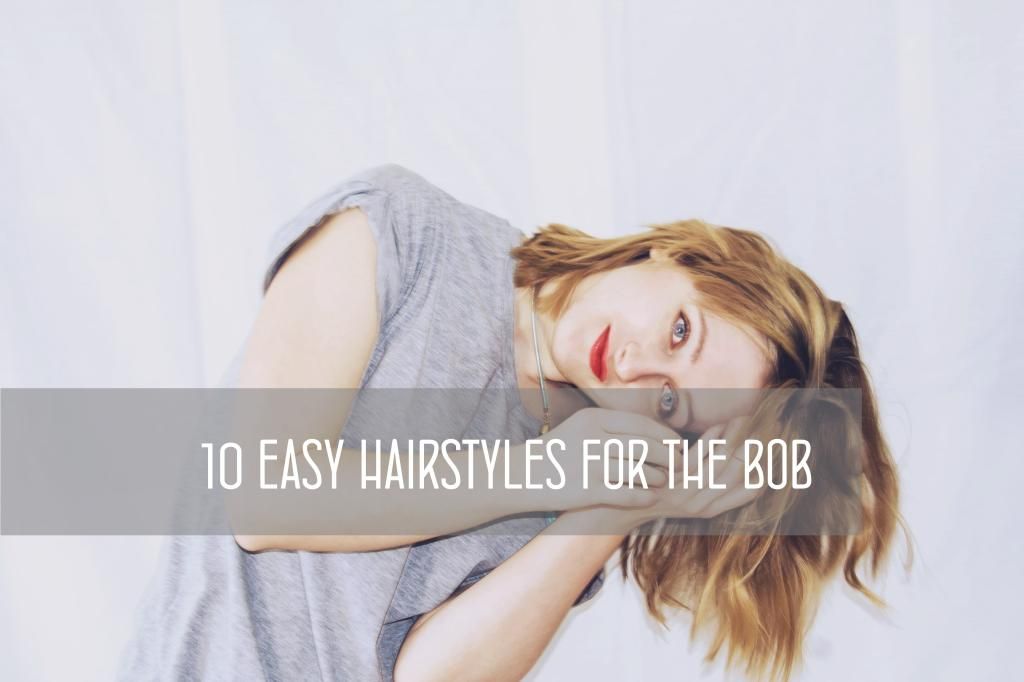
10 easy hairstyles for the bob (and lob)

 photo IMG_0332 Kopie_zpstubsaone.jpg
When I cut my hair a few weeks back I was thrilled about all the new possibilities that come with it. I have to admit that my first hair styling attempts took ages! I feel like I still have to figure things out that work for me, but I'm getting there. Practice is everything! And of course I did my research (I'm a scientist!) which means that I raided Pinterest for hair tutorials and inspiration and collected a few, that I want to try sometime. If you have a bob or a lob, too, these hair style ideas might be something you would want to try out!

1. easy waves
2. twisted half-updo
3. knot tie updo
4. ballet bun
5. braided back
6. fishtail braid half-updo
7. quick rolled braid updo
8. messy knotted bun with a braided band
9. mini twists
10. easy 1960's-inspired updo

I can't wait to try every single one out and make my hair look pretty and all. I love the messy knotted bun with the braided band! My hair lacks the texture to pull that style off, but maybe if I curl it first and with tons of hairspray ...?


20. Februar 2015

Chop, chop, chop.

 photo IMG_0338_zps4412f649.jpg  photo IMG_0343_zps31dcdf79.jpg  photo IMG_0328_zps69650b99.jpg  photo IMG_0352_zpse1175e90.jpg  photo IMG_0382_zpsc288f026.jpg
The past few months I was constantly annoyed by my long, heavy, boring hair that I was only wearing in ponytails at that point. I know, I know, there are a thousands of awesome hairdos for long hair, but my hair is very thick and also super straight and sleek by nature with no texture or natural wave or anything that would make a bobby pin stick in it for longer than 5 minutes. You can't just twirl here and braid there and put in three bobby pins, like they do in all the hairstyle videos, and you look perfect all day long. And to be honest, I'm too lazy to curl it for 2 hours before I can even begin to style it.
You see: The long hair had to go. So I took some time, I made an appointment, and I got my hair cut. And I love it! Hello new hair! Hello new possibilities!
Only drawback: I was told that I look 5 years younger than I did before. Considering that I already did look 5 years younger than I actually am, I'm now back at sweet sixteen. Oh please no! I started to wear red lipsticks to make me look a bit older than that. And because red lipstick is awesome. I'm looking forward to looking like 30 when I'm 40, though. Ha! Great times ahead.
So what do you think of my new hair? Is a bob, long or short, something you would try?

I have to go now. Have to search Pinterest for hairstyles for shorter hair. Bye!

PS: The necklace is handmade. Find the tutorial here.

3. November 2012

DIY Crocheted Hair Ties

Last week was a busy one. University-busy, not crafty-busy. And always when I'm having a busy week and I'm working like crazy my brain just likes to tease me with all the creative things I could be doing instead. A nasty brain I have. So between homework and studying I decided to whip up these lovely crocheted hair ties and it took me less than 45 minutes for all three of them! I got the inspiration from a picture I once saw on Pinterest, you can find the related link here.

You'll need: A simple hair tie, best are ties that are slightly darker than your hair or slightly darker than the color of the yarn (you won't see them shining through later). Yarn in a color you like. A crochet hook, mine was size 3. Scissors.
The white one was designed to look like you took a simple crocheted ribbon instead of a hair tie, so I added fake ribbon ends and a knot.
[1] Start with a slip knot and continue with 5-7 chain stitches. This is the first end of the "ribbon".
[2] Next, take the hair tie and place the crocheted chain on the front side and the rest of the yarn on the other side. With the hook grab the yarn and pull it through the hair tie and up, forming a loop. You should have two loops on your crochet hook now. Get yarn from over the tie and pull it through both loops. Again, pull yarn through the tie and up, forming a loop and pull yarn through both of them. Continue crocheting all the way around the hair tie.
[3] If you're done, finish with 8-12 chain stitches to form the second "ribbon" end.
[4] With the last stitch, cut the yarn and pull it through. Cut both ends of the yarn a bit below the first crochet stitch. Tie a knot with both ends. You're done!
For the other two, start immediately with crocheting around the hair tie. Try crocheting more rounds or different colors for different looks. And don't forget to hide the ends of the yarn!

I'm in love with the light and natural look of these hair ties. I might try more colors or different styles to fit every single outfit I have! If you try these, please send me a picture, I'd really like to see your designs!

25. Oktober 2012

DIY Long Feather Hair Clip

Some weeks ago I found a mixed collection of wooden beads in a shoe store. Yes. A shoe store. You find beautiful things in the strangest places. The first project where I used the beads is this lovely long feather hair clip. This one is just perfect for any autumn outfit and you can wear it in many different ways. I wore it on and under the top layers of my hair and twisted around a top bun (secure with the hair clip and/or a few additional pins) and loved how it looked! Have fun making your own long feather hair clip! Here's what you need:
[1] Material: Thread, as long as you want the feather accessory to be plus a little extra. Thin brass wire. A snap hair clip. A bunch of feathers, collected or bought. Different wooden beads.
[2] Fasten one end of your thread to the snap hair clip with a tight knot. Cut the short end so it's hidden behind the clip. You can also use a blob of glue to secure everything to the clip.
[3] Twist some brass wire around the thread where you want the first beads and feathers to start. Twist it very tight around the thread to make sure it won't slide down when you put the clip on. Form a little stopper for the beads as you twist. When you are ready, get your beads and make sure that the thread and the wire are going through them.
[4] Next, place two ore more feathers into the last bead. Secure everything with another wire-stopper, but this time you twist  the wire around the thread and the feathers, securing beads and feathers in just one step! Cut the wire and hide the end.

Leave some space and then repeat the whole process further down the thread until the feather clip reaches the desired length. The clip looks lovely if it's slightly longer or if it's shorter than your hair as well! Try creating a few matching feather hair clips in different lengths or knotting more than one thread to your clip for a more "feathery" look.
Related Posts Plugin for WordPress, Blogger...