Posts mit dem Label Accessories werden angezeigt. Alle Posts anzeigen

14. November 2013

Make a statement! - Part 3: The wrapped asymmetric bib necklace


Hello, hello! Welcome to part three of the "Make a statement!" series (woohoo!)! For this one I didn't really know what I wanted to do, but I had made this clay rings earlier and there was embroidery thread all over my desk from working at cross stitch portrait orders for my shop -  and that's basically how this necklace came to be. And it's really easy and fun!

So here's what you need: polymer clay in any color (because you're going to wrap it with thread), embroidery thread in mustard yellow, terracotta and brown, thin flat leather strips (like these), leather cord in the same color, fabric glue.
[1] Take small pieces of polymer clay and roll them into little "snakes". Form them into rings and blend out the ends so you get nice rings. Bake in the oven following the instructions on the package.
[2] To wrap the rings, place a very small blob of fabric glue onto the ring. Anywhere is great. Now take about 0.5 meter of the embroidery thread and place one end onto the glue and press it down a bit. Start wrapping the thread around the ring.
[3] Wrap all the way around. You can secure the thread here and there with glue if you're scared that it's going to slip out of place. When you reached the end, cut of the remaining thread. Put a little bit of glue onto the ring and the very end of the thread, push the end down and smooth it out with your finger. Let dry.
[4] Make some more wrapped rings!
[5] Cut the flat leather band into small pieces. Try out which length you need to get around two rings and add a few millimeters. Use them to connect the rings in a way you like. Add two at the outer ends where you pull the thin leather cord through. And then -Tadaaa!- you have a necklace!

I like this necklace very much as it has this wintery warm vibe and looks so good with  any of my blouses!

Find the other parts of the "Make a statement!" series here:


25. Oktober 2013

Make a statement! - Part 2: The blue polymer clay necklace

Ladies and Gentlemen, here comes the second statement necklace tutorial in our "Make a statement!" series! And obviously I like to post pictures of myself on the Internet these days. That's new. No really, I'm a little self-conscious when it comes to pictures of me on the web, but I honestly didn't know a better way to show off my necklaces.
So. This time I made a necklace using polymer clay. I always wanted to experiment with polymer clay but for some reason I was always out of ideas for useful projects. Good thing my clay packets where laying just in front of me when I thought of statement necklace ideas! The polymer clay necklace is very fast and easy to do and uses only few materials. Depending on the colors you use to paint the clay pieces you can create a delicate piece with pastels (like mine) or a real eye-catcher with bright and bold colors. It's up to you!

[1] Supplies: a sheet of waxed paper, white polymer clay, tooth picks, a knife, leather cord, acrylic paint in different colors, a paint brush, a rolling pin (but better not a wooden one like in the picture if you don't want wood in your clay) or a glass.
[2] take a piece of polymer clay and roll it out on the wax paper using a rolling pin or a glass. Don't make it too thin, because you'll have to get toothpicks through the sides without the clay breaking.
[3-4] Cut out different shapes and pierce them with tooth picks where you later want the leather cord to go. Pierce one or two with two tooth picks. This will allow you to "stack" the pieces afterwards instead of just having them in one row. Be very careful and slow when pushing the tooth picks through the clay to prevent deformation or breaking of the piece. When the tooth picks are in, smooth out all rough corners and edges with the knife or your fingers.
Pull the tooth picks out very slowly (it's easier if you twist them a bit) and bake the clay pieces in the oven following the instructions on the package.
[5-6] After baking and cooling, paint them with acrylic paint just as you like. I chose different muted blue colors. You can either paint on side of the clay piece first, let dry, turn, and paint the other side - or you can insert tooth pics into the holes, paint the clay pieces from all sides, and hang then in boxes or similar to dry like shown in picture 6.
[7-8] Get the leather thread and put your necklace together. I tried different variations until I found the one I liked most. Cut the cord to a length you like and start wearing your new statement piece immediately!

Find the other parts of the "Make a statement!" series here:


10. Oktober 2013

Make a statement! - Part 1: The red braided rope necklace

Hey there! Today is the start of a little series that I've planned without telling anyone! We're going to be making some awesome statement necklaces these next few weeks! Yay! I think it's the perfect time of the year for statement necklaces. The grey and cold weather outside calls for bold colors and a big chunky statement necklace is just perfect if you're wearing more layers and thicker fabrics where a delicate tiny golden one would be entirely lost and practically invisible.
So statement necklace month it is!
We start with a very beautiful (and very red) braided rope necklace. I very much love the knit look of this one!
[1] Supplies: Ca. 1,5m of 4-6mm wide knit rope/tunnel stuff (I really don't know how it's called, but can be found here). Small wooden beads. Red thread. A needle. Scissors.
[2] Cut three pieces of the knit tube, two 25cm long and one 90cm. Fill all three with the same amount of beads. Make sure they are nicely centered in the long one.
[3] Now you have three tubes filled with beads. Nice!
[4] Gather the right ends of all three pieces and sew them together where the beads start. Just some stitches to secure the whole thing. Loosely braid the three strands and secure the other end.
[5] Cut two short pieces of knit tube (3-5cm), wrap around the ends where you sew them together and stitch it close. You can skip this step but it looks much cleaner if you don't. If you don't like sewing you can also wrap the short pieces around and fixate with some fabric glue.
[6] Cut the short tube ends as close as you can. With the long ones tie a knot behind you neck and you're ready to go!


Find the other parts of the "Make a statement!" series here:


24. Juli 2013

Easy peasy key pendant in less than 10 minutes!

A few days ago there was this lonely key for our basement storage room. It was all alone and I felt it needed to be cheered up a bit. I made a super easy pendant for this key and I think it really does look happier now, don't you think?
[1] Supplies: 16'' black nylon cord (diameter 0.1'' or less), a gold end cap (diameter 0.3''), hot glue gun.
[2] Cut the nylon cord in 4 pieces with 4'' length each.
[3] Melt the ends a bit so they won't fray.
[4] Fill the end cap halfway with glue and stick all cord ends in in. Let dry.

Done! Well, that was easy, wasn't it? I always love a quick and easy project!

14. Juni 2013

DIY: Flower Head Band


I made this flower headband the day before we left for the Immergut festival. Or was it the day we left? Either way it was a simple last-minute project that can be whipped up in just a few minutes. And did I mention that I got a lot of compliments for it at the festival? Yes, mostly from strangers and yes, some of them might have been drunk, too. But who cares? I'm not overly picky if it comes to compliments.
Here's what you'll need:
A hot glue gun, fake flowers with leaves (which are also fake), a simple metal head band, some faux suede leather band in the color of your hair, scissors.
[1] Cut two small pieces (1 inch should be enough) of faux suede leather band and put them aside. glue one end of the rest of the leather band to the metal head band like shown in the picture.
[2] Take one of the small pieces and glue it over the metal frame like you see in the picture. Let the hot glue harden and then start wrapping the long leather band around the head band, hiding the metal underneath. Stop at 3-4 inches. Cut the end and glue it onto the head band.
[3] Repeat for the other side.
[4] Cut leaves from the fake flowers and glue them onto the head band. A little messy looks great, just make sure there's no metal to be seen after your done with it. And don't be afraid to use a lot of hot glue because you don't want everything to fall off if you breathe on it, do you?
[5] Cut blossoms and buds from the fake flowers.
[6] Glue them everywhere onto the head band until you are pleased with the look of it.

Done! Yay! Flower Headband! It's the perfect accessory for summer and I love that it can be worn like an ordinary headband. Honestly, it's so practical! And the faux suede leather ends are almost invisible in your hair! It also looks gorgeous worn as a flower crown, just pull it a little lower onto your forehead.

Enjoy your weekend!    Kathie

1. Juni 2013

DIY fabric bows

Hello friends! I'm excited to show you how to make bows today! They're one of my favorite accessory and you can't possibly have to many of them, can you? These bows are quick and easy to make and can be used to make cute hair accessories, brooches or for decorations around the house. Enjoy!
Supplies: Cute fabric. Scissors. Fabric glue. Needle and thread / sewing machine. Iron.

[1] For a bow that measures ca. 4'' x 2'' (10cm x 5cm) cut two fabric pieces measuring 8'' x 4'' (20cm x 10cm) and 1.4'' x 2.8'' (3,5cm x 7cm). Fold  the bigger piece in half (the long side), right sides facing, and sew close.
[2] Rotate the fabric a bit so that the seam is in the middle and sew one end of the 'tube' close.
[3] Turn the tube right sides out and iron it flat. Fold the smaller piece in thirds (the long side) and iron it flat. Fold the ends of the bigger piece's open end in and sew the opening close.
[4] Fold the big piece in half and open again to mark a middle line. Fold both ends to the middle and secure with a tiny blob of fabric glue.
[5-6] Turn the piece over and pinch the middle together like in the pictures. Secure with a blob of glue in the middle.
[7] Turn the bow around and secure with glue.
[8] Now take the small fabric piece and wrap it around the middle. Cut to size if it's too long and secure with glue. It looks a little messy in my picture, but that's okay as the glue dries transparent. So don't worry about that!

That's it! A bow! Now proceed by making more bows!
I used these bows for an extra-special project, so there's going to be another DIY using these bows soon!

26. April 2013

Friendship Bracelets Part 2: Forward Knot and Chevron Bracelet


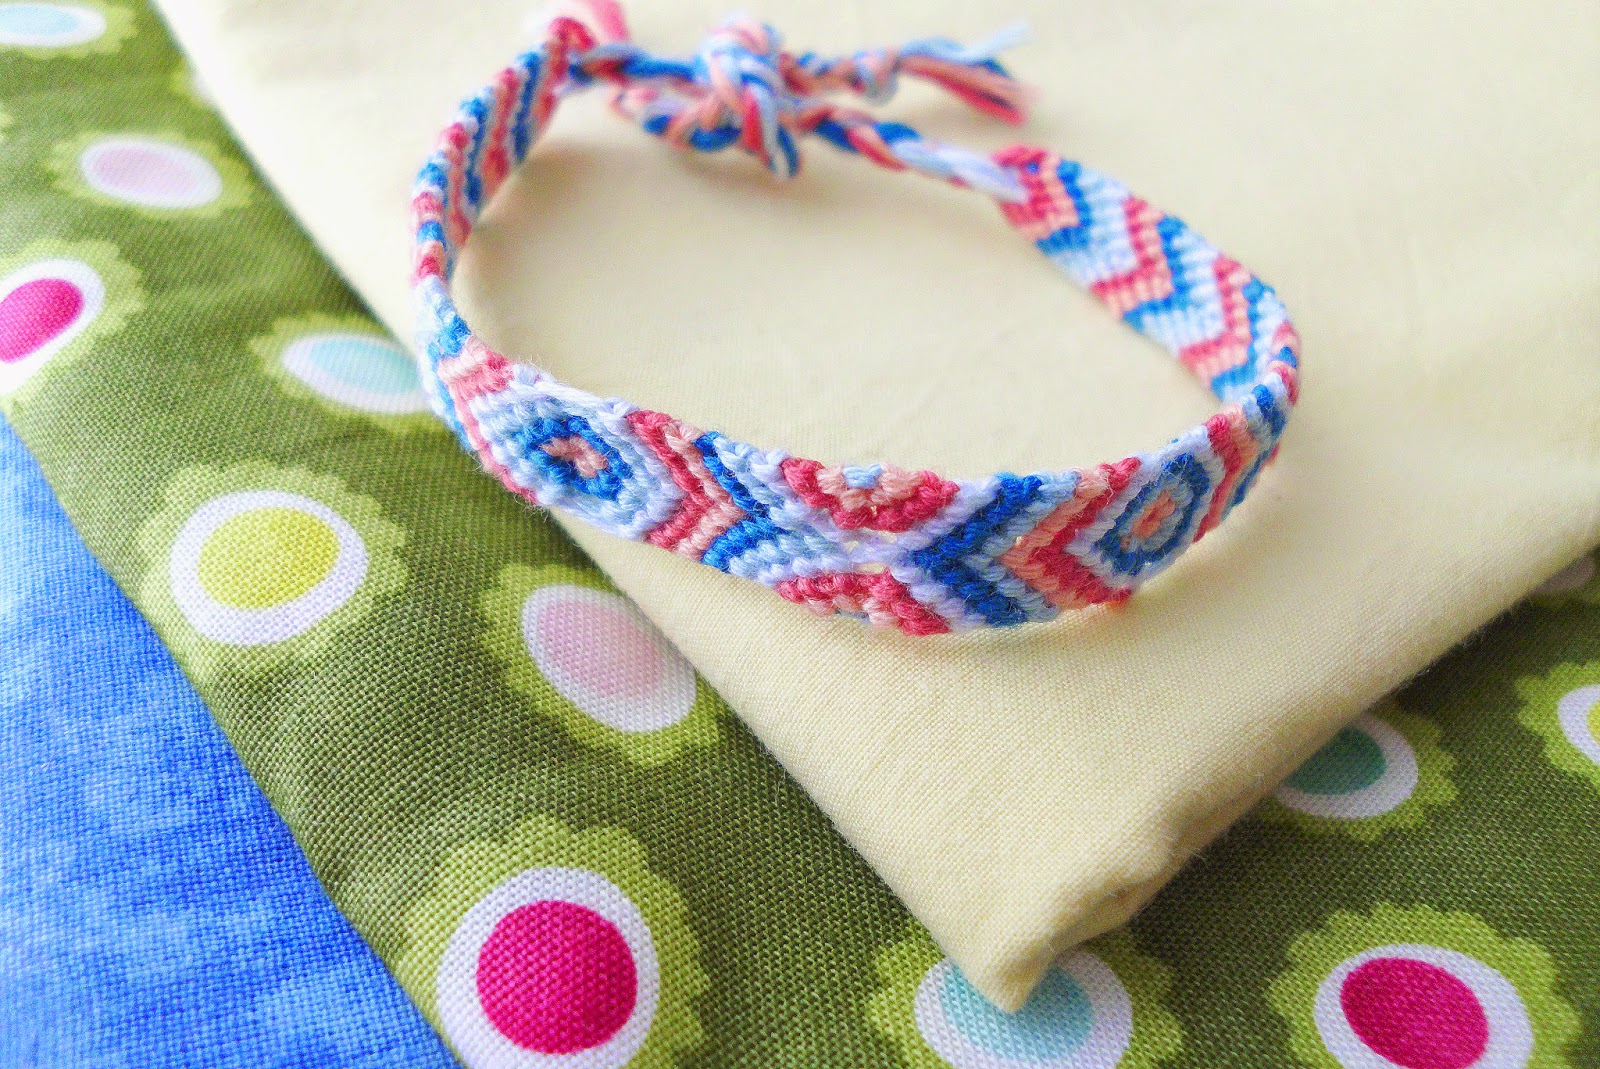
Finally. Part two of the friendship bracelet series is here! This time I'll show you how to do a forward knot and how to make a chevron friendship bracelet using only forward and backward knots. Easy! And for those who are bored with that easy chevron pattern, I added instructions for turning the direction of the chevron pattern from upwards to downwards and back. With all these information you'll be able to make a chevron friendship bracelet just how you like it.

For the backward knot and an even easier pattern for a friendship bracelet, check out part 1 of the friendship bracelet series!


The Forward Knot

[1] You start with two strings next to each other. The right string should be held tight all the time while you work with the other string (the working string).
[2] Using the left string, form a loop over and around the right string. Pull the string through the loop from behind.
[3] Now hold the right string tight and pull the working string to the right. It is easier if you use your right hand for that. You now have something that looks like a tiny knot, but that's only the half of it.
[4] Repeat steps 2 and 3. Afterwards, there's a knot in the color of the string you worked with and the working string moved to the right.


Striped Friendship Bracelet

Material:  Embroidery thread in different colors (I recommend this. Every color you can think of in one box!), Scissors.
Preparation:
Choose the colors you would like to have in your bracelet. For a symmetric chevron pattern his could be up to 5 different colors, as you have to have 10 strings of embroidery thread.
Then choose an ordering and place the threads next to each other like in the picture above. The color ordering is mirrored in the middle (1,2,3,4,5,5,4,3,2,1). The colors will appear from outer to inner. When you have an ordering, tie a knot at about 5 inches from the top. Tie the short end to a chair or a table or to anything that will resist some pulling. Reorder the strings.

[1] Take the first two threads from the right and make a backward knot (bk) like in part 1. You will have a knot in the color of the outermost string (which is now second from right).
[2] Take the next two strings (number 2 and 3 from the right) and make a bk which then should have the same color as the knot before. Repeat for the next three string (until you reach the middle) and you have your first half of a chevron. It probably looks not straight at all but that's normal. Just continue!
[3] Now take the first two threads from the left and make a forward knot (fk) like described above. You will see it's just like a bk but only that you work from left to right with this one.
[4] Continue with the fk up to the middle and finish the first chevron stripe by making a fk over the thread in the middle (which has the same color).
[5] Start from the right again and repeat steps 1,2,3 and 4, resulting in a second chevron stripe. Continue the chevron pattern.

You can make a whole friendship bracelet in this way. But if you want to know how to spice it up a little bit, keep reading!


Change of direction (downwards to upwards)


[1] For a turnaround start like normal with bk from the right but stop after three knots for the first color, two for the second and one for the third.
[2] Using fk go back to the right, making two knots with the second color (orange in my case) and three for the third color (red).
[3] Repeat step 1 and two for the left side. Always go right with fk and left with bk.
[4] Now take the innermost strings. With the left one go left with bk and with the right go right with fk. You have your first chevron in the opposite direction!
[5] Continue making chevrons starting in the middle with a knot (bk or fk) and continuing from the middle outwards with bk to the left and with fk to the right.


Change of direction (upwards to downwards)


[1] For a turnaround from upwards to downwards start like normal but only go three knots to the right and left with the first color (blue), two to each side with the second color (light blue) one with the third (orange) and do only the one knot in the middle for the forth (red).
[2] Now work inwards again. With the right orange thread to a bk to the left, with the left orange thread do two fk to the right.
[3] With the right light blue thread: two bk to the left. With the left light blue thread: three fk to the right.
[4] With the right blue thread: Three bk to the left. With the left blue thread: four fk to the right.
[5] With the next thread start following the normal chevron pattern instructions again (see above).
[6] To finish your bracelet, untie the knot at the top and braid both ends.


You can design your chevron bracelet as you like it and take as many turns as you like or no turn at all. The result looks quite amazing and much more difficult than it is. So don't be afraid of all the instructions. It's easier than it looks!
If you try it, please send me a link or a picture, I'd love to see your version of the chevron friendship bracelet!


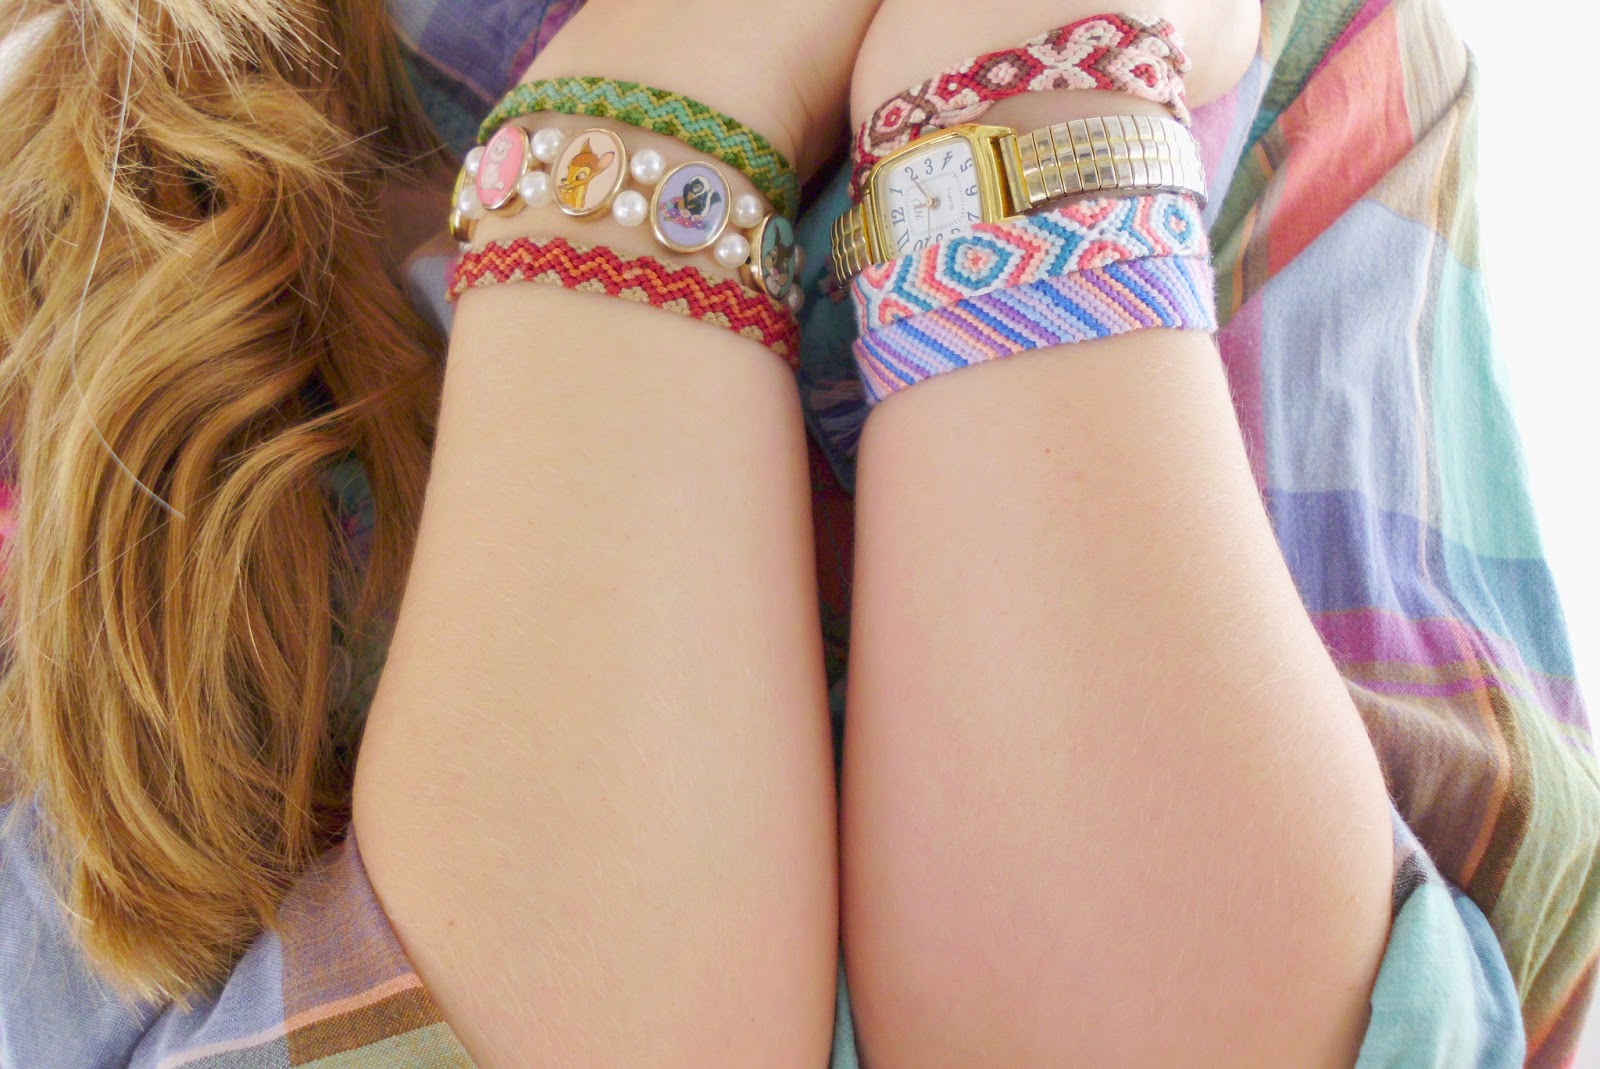
Edit: I got quite a lot questions about that Disney bracelet on the very first picture. So for anyone who's interested in that: I bought that bracelet quite some time ago at the H&M children's department. I couldn't resist :)

10. April 2013

Friendship Bracelets Part 1: Backward Knot and Striped Bracelet


Do you remember the 90's when everyone was crazy about friendship bracelets? I used to make all kinds of friendship bracelets when I was a kid. The results where great but I remember enjoying the process the most. Precisely following a pattern, making all knots neat and tight, and bringing up the patience to stay with it until it's done. Yeah! But friendship bracelets aren't only for school kids. These colorful bracelets are cute and really bring you in the mood for spring and summer! I like to wear a few of them at once or combine them with some "metal" bracelets. You can even make one for every outfit you have!

For those of you who never made a friendship bracelet we'll start with the easiest pattern one could think of. You only have to know how to do a backward knot. Easy peasy. And the result is quite nice! So let's jump right in and start knotting!

The Backward Knot

[1] You start with two strings next to each other. The left string should be held tight all the time while you work with the other string (the working string).
[2] With the right string form a loop over and around the left string. Pull the string through the loop from behind.
[3] Now hold the left string tight and pull the working string to the left. It is easier if you use your left hand for that. You now have something that looks like a tiny knot, but that's only the half of it.
[4] Repeat steps 2 and 3. Afterwards, there's a knot in the color of the string you worked with and the working string moved to the left.

Striped Friendship Bracelet

Material:  Embroidery thread in different colors (I recommend this. Every color you can think of in one box!), Scissors.
Preparation:
Choose the colors you would like to have in your bracelet. This could be up to 10 different colors, as you have to have 10 strings of embroidery thread. But you can also choose only two. Or five. or eight.
Then choose an ordering and place the threads next to each other. The colors will appear from right to left. When you have an ordering, tie a knot at about 5 inches from the top. Tie the short end to a chair or a table or to anything that will resist some pulling. Reorder the strings.

[1] Take the first two threads from the right and make a backward knot like described above. You will have a knot in the color of the outermost string (which is now second from right).
[2] Take the next two strings (number 2 and 3 from the right) and make a backward knot which then should have the same color as the knot before. Repeat for all 10 strings and you have your first stripe. It probably looks not straight at all but that's normal. Just continue!
[3] Start from the right again and repeat steps 1 and 2, resulting in a second stripe.
[4] Repeat steps 1 and 2 until your bracelet reaches the desired length.
[5] Untie the knot at the top of the bracelet, braid both ends and tie a knot at the ends.

That's it! Pretty easy, huh? You can do it, let's go!
I'm planning a second post about friendship bracelets with a bracelet that is a little harder, so please practice this one while you wait and you will be well prepared!


Edit: I got quite a lot questions about that Disney bracelet on the very first picture. So for anyone who's interested in that: I bought that bracelet quite some time ago at the H&M children's department (It's a little tight around my wrist but I love it anyways!).

22. Februar 2013

DIY Birdie Purse


It's always fun to try something new! Today I was sewing with felt for the first time and I was amazed how easy it is to work with this material. It's soft, a little stretchy and the edges don't fray, you can even glue the pieces together! Which I did, actually, but only the smallest pieces.
I don't really remember how I got the idea of making a birdie purse. It had to be an odd combination of a stack of felt, an orange zipper that crossed my way while looking through boxes and looking at cute birds on the Internet. However, I'm glad I had the idea because this little purse is all the cuteness I can handle. The perfect little thing to carry my money or keys around in! It's probably a great gift idea for kids, too. That's why I put it in the "for kids" section on the "Tutorials" page.

If you want to make your own birdie purse (which I highly recommend just because it's adorable!), I hope you enjoy the pattern I made for you and uploaded to Scribd.

Supplies: Orange, black, red, white, pink and light pink felt. A short orange zipper. Scissors, pencil and textile glue. Needle and thread (and, optional, a sewing machine). Some pins.

[1] Print out the pattern, transfer to the felt and cut out all pieces. The piece of felt for the side has to have the same width as your zipper and the total length of zipper plus felt strip equals the circumference of the bird's body.
[2] Sew zipper and felt strip together: Put the two pieces right sides together and sew them together near the base of the zipper.
[3] Arrange the belly and the feathers like in the picture. You can sew the belly onto the body now, but I found it easier to do it later on (see step 6). Fixate all pieces with pins. Then decide where you want the zipper to start and which direction to go. Then place the side piece on top of the body piece, right sides together, and fixate the point where you want to start sewing with a pin, so that the edges of the body and side pieces align.
[4] Sew on the side piece. Make sure the edges of the two layers always align while you sew them together. Then sew on the back piece in the same manner.
[5] Open the zipper and turn the purse right sides out. It should look somehow like in the picture above.
[6] Now sew on the belly with short stitches. Glue on the beak, cheeks and eyes and let dry.

Now your birdie purse is ready to be filled with little things and fill your life with cuteness in return! What a great last sentence that was...


8. Januar 2013

DIY Acorn Cap Ring


Sorry for being so quiet last week. I wasn't feeling well and spent much time sleeping and lying around and watching TV. Now I'm back and I brought this simple DIY tutorial with me. You might remember that I collected acorn caps back in late November (read here) and I thought you might be curious what happened to them (You ARE curious, right!? Riiight?). And the best about it: It's a two-steps-tutorial!

Supplies: An acorn cap. Nail polish. Thin brass or aluminum wire. A ring base with holes pad. Pliers.

Preparation: Clean the acorn cap and remove the stem if it has one. If there's no small hole in the middle, drill one in. Paint the inner side of the cap with nail polish. I took silvery polish and painted two coats. Let dry.
[1] I would recommend to choose the wire in the same color as the ring base, I think it will look nicer that way. But I didn't have a golden ring base or silver wire, so my colors are mixed. Secure the wire to the middle of the ring plate. You can do this with one end or the middle area of the wire.
[2] Place the acorn cap on top of the ring plate. Move the wire around and pull it through the hole from the top and down through a hole in the plate. Pull it up again through another hole and repeat the process. Do this as often as you like. Afterwards, wrap the remaining wire around the base of the acorn cap (between the ring plate and the acorn). It's just perfect if it looks messy! And don't forget to hide the ends of the wire.

20. Dezember 2012

Leaf Keychain

I sewed a big white, red and dark brown shopper bag for my mom (see here) as a Christmas present. As I already told you, I inserted my very first zipper pocket to the front of it and thought it needed some embellishment. In green. A leaf! So I came up with this little and nice project of this lovely faux leather leaf keychain. This faux leather lef keychain is fast and easy to make and looks great on every key or bag and you can use it as an ornament as well!

Supplies: Green fauy leather. Paper and pencil. Scissors. Needle and thread and a sewing machine, but it's not too difficult to sew it all by hand. A lighter (optional).
[1] Sketch a leaf. This is simple, you don't need a pattern for this and it doesn't have to be perfect, there's no such thing as the perfect leaf!
Transfer to the back side of your faux leather and cut out two pieces (front and back side) and a small strip (about 2 x 0.3 inch and no seam allowance needed).
The smaller piece will form a loop in the end and we'll leave the edges raw. If you are afraid the back side of the faux leather will fray, you can melt it a little bit with a lighter. But don't burn it!
[2] Lay the smaller piece onto the leaf like this and cover with the second leaf piece, right sides together. Fixate and sew along the marked line with a simple straight stitch using a sewing machine or by hand. Leave a small space of about an inch open.
[3] Cut away most of the seam allowance. This will make it easier to turn the leaf inside out and it will make it less bulky. After this, turn it inside out by pulling everything through the hole you left.
[4] Sew the opening close by hand. If you use a mattress stitch the seam will be almost invisible.
[5] With a sewing machine or by hand, stitch the leaf veines on.

This is a cute last-minute gift and it's pretty easy too! Enjoy making your own leafy keychains if you can find the time during these crazy days of Christmas... Isn't it weird how people stress themselves out for weeks in order to set everything up for a few quiet and peacful Christmas days? I think it's weird... However, I hope your days are joyful and stressfree!

24. November 2012

DIY Mini Bottle Necklace

I have to admit that I made these adorable mini bottle necklaces already some time ago but didn't post about it for some reason. But here it is. Finally! Let's celebrate! Ok. Maybe not. I think I had too much coffee this morning...
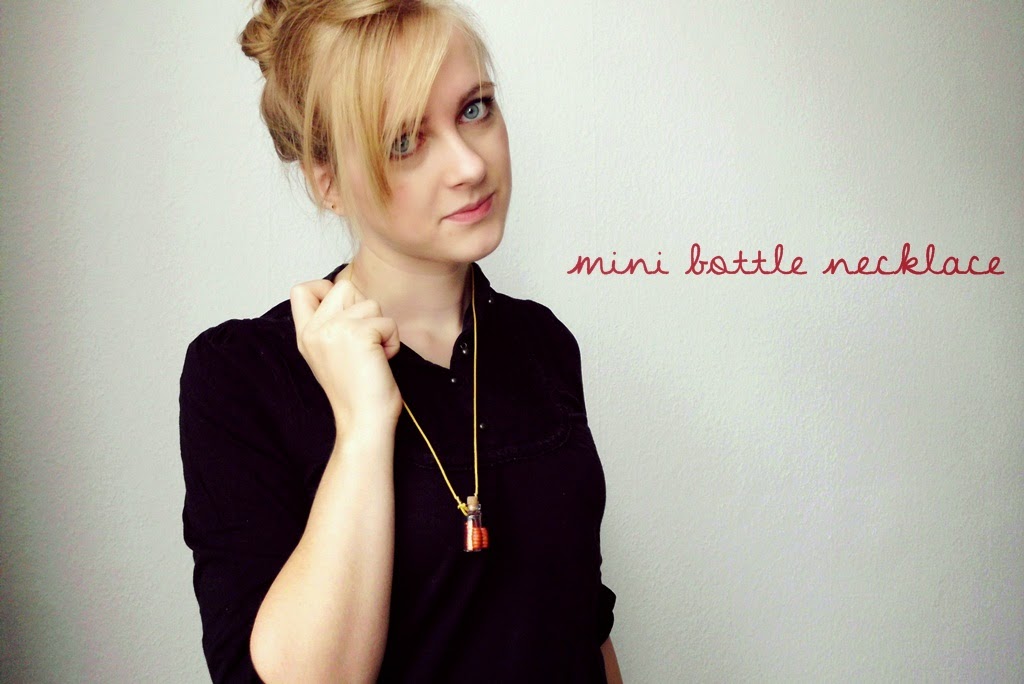
So the reason why I finally post about the bottle necklaces is: I love them and wear them a lot and I have to share things I love with the world. Simple as that. I made two of them. For the first I used leather thread, wood beads and some rust-colored glitter, the other was made using a simple golden necklace, a golden leaf charm and some lace. You see they are quite different. It's great how they can be combined with many of my daily outfits. I love how these bottle necklaces can be made with a whole range of different materials and filled with tiny lovely things. I can imagine filling them with sand from the beach of your last vacation, dandelion seeds, your favorite fabric, colorful thread or beads or even some sort of liquid (I don't know if that's actually possible but it would certainly look awesome!).
In this post I will only describe how to make the leather-glitter-wood-necklace. The instructions are easy to adapt for every other type of necklace you might have in mind.
Supplies: A tiny bottle, i found mine in a local craft shop. Some yellow leather thread, 4-6 inches longer than you want the necklace to be. Sturdy  dark brown cotton thread 10-12 inches should be enough. Thin brass wire. Rust-colored glitter as filling. Scissors, glue, two wooden beads.
 [1] Cut the leather thread as long as you want your necklace to be plus 4-6 inches. If the length will suffice to pull the necklace over your head you won't need some sort of closure. Just take one end of the thread an do a slip knot, forming a tiny loop. Secure the loop with brass wire and cut the loose end. Do the same for the other end of the leather thread.
[2] To tie the bottle to the necklace take a 10 inch piece of the brown thread and pull it through both loops we just made in step 1.
[3] Now wrap it around the bottle neck, cross in front, go through the loops again, cross in the back, go through the loops and then tie a knot in front. Be careful to have the loops on either side of the bottle. It won't be too easy to adjust afterwards. Cut the ends of the brown thread to about 1 inch.
[4] For the last step, take two wooden beads and "fill" them with glue. No. Really. Fill them. put the ends of the brown thread inside and let dry. When it's dry, fill it with whatever you like. I used rust-colored glitter. You can glue the stopper into the bottle neck if you want, but it's not a must.
There you have your own mini bottle necklace!

Edit: If you don't like the version where you tie the necklace to the bottle neck, you can as well pierce a small hole through the stopper (use a needle) and insert a piece of wire. Secure it at the bottom and form a small loop at the top. You can then insert your necklace through that loop. In this case I recommend gluing the stopper into the bottle.

Have fun making your own mini bottle necklace! I'd love to hear about your ideas to design it!

20. November 2012

DIY Tube Bead Bracelet

On my birthday last month, my grandma gave me a set of those thin metal bracelets (see picture below). I have to admit that I never really liked these bracelets because they're too thin to be worn alone (and with a set of ten you could as well give the other nine away) and they tend to be quite noisy when worn in a bunch. So I took two of the bracelets and used them to make something I liked much better: A super simple bracelet using tube beads. Enjoy!
[1] For this bracelet you'll need: Nylon beading cord, 0.01 inch in diameter (should fit at least 4 times through the beads you use). A bunch of 0.8 inch tube beads (also found as bugle beads) in the colors you prefer. If you're lucky as I was you find a set of leftover beads in a perfect set of colors for a very low price. You also need two simple metal bracelets and scissors.
[2] First, cut the beading cord to the desired length, depending on how much of the circumference of the bracelet you want to cover. For the one I made take 5.3 feet. Take the first tube bead and place it in the middle of the cord. Now take the first metal ring bracelet and place it on the right side next to your bead like in the picture. Then, take the the cord on the same side and move it over the ring, around, under the ring and through the bead. This should look like in the picture.
[3] Take the other metal ring and do the same on the other side of the bead (over ring, around ring, under ring, through bead). Do it again for both sides for more stability. The bead should now stay in place without any much help.
[4] Take the second bead and place it between the metal rings. Fasten it in the same way as the first one. But once for both sides of the cord is enough this time. Remember: over, around, under, through. This is important. Your bead will be loose and not centered between the rings otherwise.
[5] Continue until you reach the desired length. Push the cord through the bead some more times, cut the ends leaving about half of the beads length and push it inside the bead.

The bracelet is surprisingly sturdy in the end. I like how the beading cord is almost invisible and how the bracelet looks so much better now. Fashionable and colorful and doesn't even look self made! Have fun making your own!

3. November 2012

DIY Crocheted Hair Ties

Last week was a busy one. University-busy, not crafty-busy. And always when I'm having a busy week and I'm working like crazy my brain just likes to tease me with all the creative things I could be doing instead. A nasty brain I have. So between homework and studying I decided to whip up these lovely crocheted hair ties and it took me less than 45 minutes for all three of them! I got the inspiration from a picture I once saw on Pinterest, you can find the related link here.

You'll need: A simple hair tie, best are ties that are slightly darker than your hair or slightly darker than the color of the yarn (you won't see them shining through later). Yarn in a color you like. A crochet hook, mine was size 3. Scissors.
The white one was designed to look like you took a simple crocheted ribbon instead of a hair tie, so I added fake ribbon ends and a knot.
[1] Start with a slip knot and continue with 5-7 chain stitches. This is the first end of the "ribbon".
[2] Next, take the hair tie and place the crocheted chain on the front side and the rest of the yarn on the other side. With the hook grab the yarn and pull it through the hair tie and up, forming a loop. You should have two loops on your crochet hook now. Get yarn from over the tie and pull it through both loops. Again, pull yarn through the tie and up, forming a loop and pull yarn through both of them. Continue crocheting all the way around the hair tie.
[3] If you're done, finish with 8-12 chain stitches to form the second "ribbon" end.
[4] With the last stitch, cut the yarn and pull it through. Cut both ends of the yarn a bit below the first crochet stitch. Tie a knot with both ends. You're done!
For the other two, start immediately with crocheting around the hair tie. Try crocheting more rounds or different colors for different looks. And don't forget to hide the ends of the yarn!

I'm in love with the light and natural look of these hair ties. I might try more colors or different styles to fit every single outfit I have! If you try these, please send me a picture, I'd really like to see your designs!

25. Oktober 2012

DIY Long Feather Hair Clip

Some weeks ago I found a mixed collection of wooden beads in a shoe store. Yes. A shoe store. You find beautiful things in the strangest places. The first project where I used the beads is this lovely long feather hair clip. This one is just perfect for any autumn outfit and you can wear it in many different ways. I wore it on and under the top layers of my hair and twisted around a top bun (secure with the hair clip and/or a few additional pins) and loved how it looked! Have fun making your own long feather hair clip! Here's what you need:
[1] Material: Thread, as long as you want the feather accessory to be plus a little extra. Thin brass wire. A snap hair clip. A bunch of feathers, collected or bought. Different wooden beads.
[2] Fasten one end of your thread to the snap hair clip with a tight knot. Cut the short end so it's hidden behind the clip. You can also use a blob of glue to secure everything to the clip.
[3] Twist some brass wire around the thread where you want the first beads and feathers to start. Twist it very tight around the thread to make sure it won't slide down when you put the clip on. Form a little stopper for the beads as you twist. When you are ready, get your beads and make sure that the thread and the wire are going through them.
[4] Next, place two ore more feathers into the last bead. Secure everything with another wire-stopper, but this time you twist  the wire around the thread and the feathers, securing beads and feathers in just one step! Cut the wire and hide the end.

Leave some space and then repeat the whole process further down the thread until the feather clip reaches the desired length. The clip looks lovely if it's slightly longer or if it's shorter than your hair as well! Try creating a few matching feather hair clips in different lengths or knotting more than one thread to your clip for a more "feathery" look.
Related Posts Plugin for WordPress, Blogger...